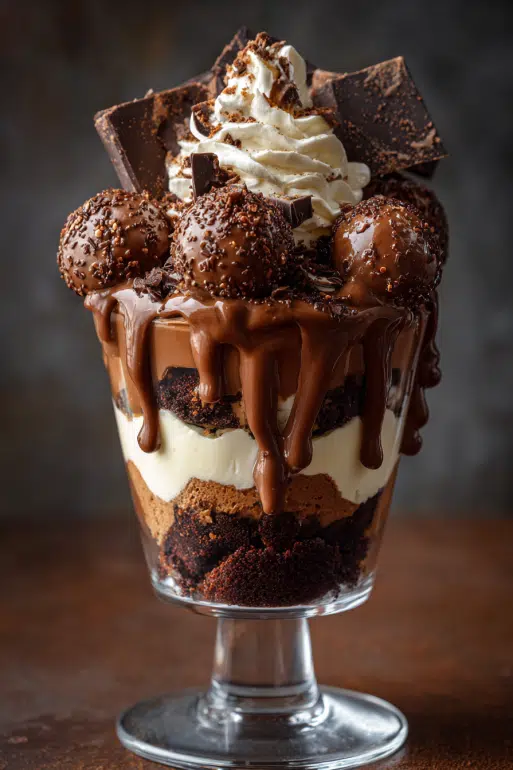
This heavenly chocolate cheesecake is more than just dessert-it’s a decadent dream layered in velvety richness, made for those moments when only chocolate will do. Born from a love of no-bake ease and deep, indulgent flavor, this recipe marries the comforting taste of a crumbled chocolate cake with whipped cream cheese, luscious pudding, and silky ganache. It’s a showstopper without the oven fuss, and one bite might just send you into orbit.
Jump to:
Why You'll Love This Recipe
Key Benefits
- No-bake convenience: No oven? No problem. This dessert sets beautifully in the fridge.
- Crowd-pleaser: Perfect for parties, potlucks, and birthdays.
- Make-ahead magic: Prepares easily in advance, freeing up time on the day of your gathering.
Taste & Texture
- Ultra-creamy and soft with pockets of cake that melt on your tongue.
- A perfect balance of tangy cream cheese and rich chocolate.
- The cool whip adds an airy lift, while the ganache drapes everything in silky sweetness.
Dietary Attributes
- Can be made gluten-free by using GF chocolate cake.
- Naturally vegetarian.
Ingredients & Substitutions
Ingredient List
- 1 package chocolate cake (baked and crumbled)
- 1 package cream cheese, softened (8 oz)
- 1 cup powdered sugar
- 1 teaspoon vanilla extract
- 1 container whipped topping (Cool Whip, thawed, 8 oz)
- 2 cups chocolate pudding
- 1 cup chocolate sauce or ganache
- Chocolate truffles or chocolate balls (for garnish)
- Chocolate shavings (for garnish)
Notes on Quality
Use a high-quality chocolate cake-homemade or boxed mix works, but homemade adds a rustic, personal touch. Full-fat cream cheese offers the best texture and flavor. For pudding, choose a brand with a silky finish, and don't skimp on the ganache: a glossy, real chocolate sauce makes all the difference.
Possible Substitutions
- Swap the whipped topping for homemade whipped cream.
- Use vanilla or mocha pudding for a twist.
- Substitute truffles with raspberries or chocolate-covered espresso beans for a gourmet finish.
Step-by-Step Instructions
- Crush the Cake Base: Start by baking your chocolate cake if not already done. Once cooled, crumble it into small, bite-sized pieces and layer it into the bottom of your trifle dish or serving bowl.
- Make the Cream Cheese Layer: In a mixing bowl, beat the softened cream cheese with powdered sugar and vanilla extract until smooth and creamy.
- Fold in the Whip: Gently fold the whipped topping into the cream cheese mixture to lighten it.
- Layer with Love: Spread the cream cheese mixture over the crumbled cake. Then spoon on the chocolate pudding in an even layer.
- Drizzle the Ganache: Pour the chocolate sauce or ganache over the pudding layer, letting it drip deliciously down the sides.
- Repeat: Add another round of crumbled cake and repeat the layers until ingredients are used up.
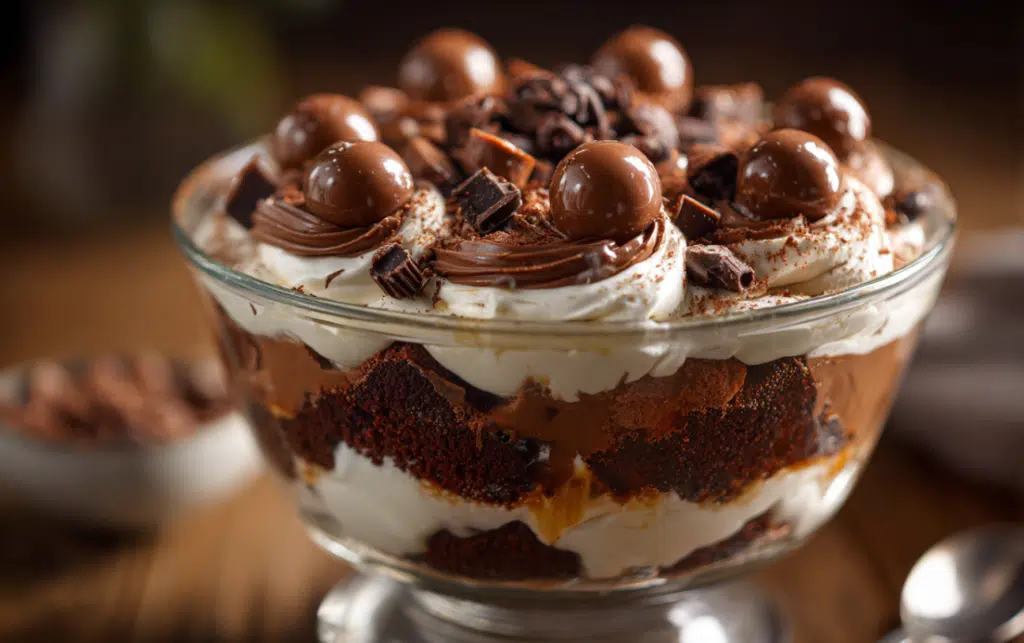
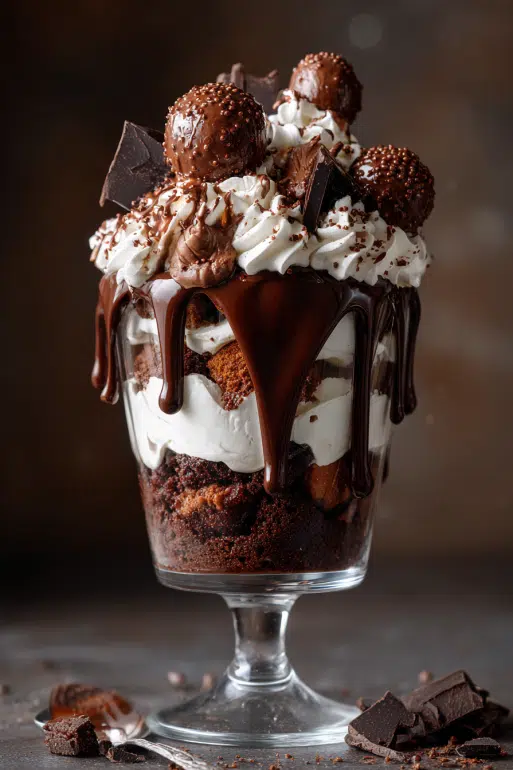
- Top it Off: Garnish with truffles, chocolate balls, and generous chocolate shavings.
- Chill: Refrigerate for at least 4 hours or overnight until set and cold.
Expert Tips & Tricks
Best Practices
- Let the cream cheese come fully to room temperature for a smoother blend.
- Chill your mixing bowl and beaters before whipping to keep the topping light.
Common Mistakes
- Lumpy layers? That means your cream cheese wasn't soft enough.
- Soggy base? Let the cake fully cool before layering to prevent moisture build-up.
Time-Saving Tips
- Use store-bought chocolate cake to save time.
- Make the dessert the night before your event for best flavor and texture.
Serving Suggestions
Pairings
- Serve with fresh berries or a tart cherry compote.
- Add a sprinkle of sea salt for contrast.
Presentation Ideas
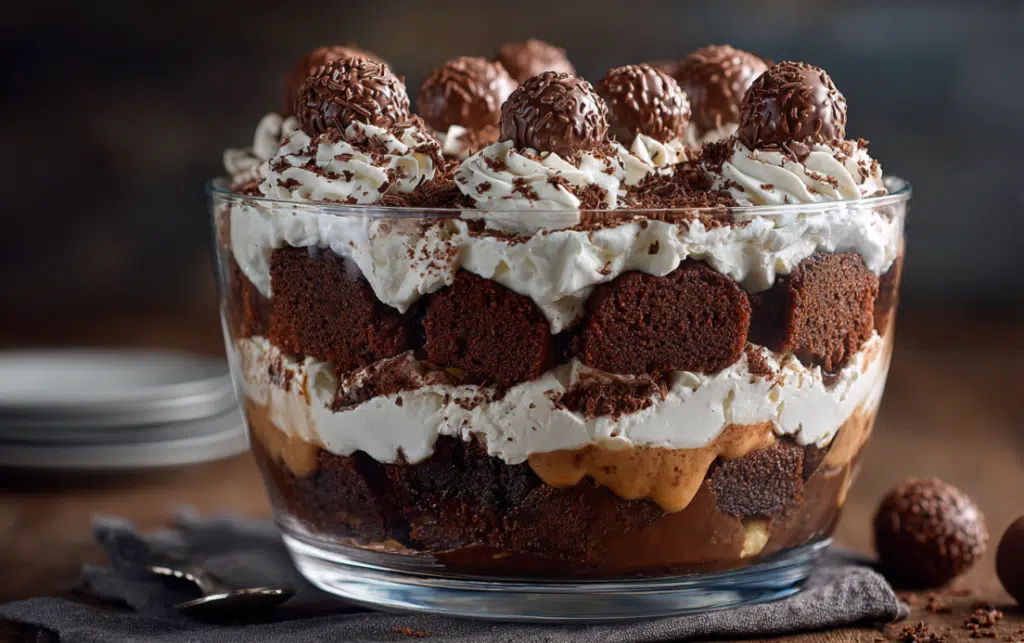
- Use a clear trifle dish to show off the gorgeous layers.
- Add edible gold leaf or a dusting of powdered sugar on top for extra elegance.
Beverage Pairings
- Pair with espresso or a glass of port wine.
- A cold glass of milk never fails.
Storage & Reheating
Leftover Storage
- Cover tightly and store in the refrigerator for up to 4 days.
- Not ideal for freezing due to the creamy layers.
Reheating Methods
- No reheating necessary. This dessert is served chilled.
Frequently Asked Questions
Substitutions & Adjustments
Can I make it dairy-free? Yes, use dairy-free cream cheese, whipped topping, and pudding.
Can I halve the recipe? Absolutely! Just divide everything in half and layer in a smaller dish.
Troubleshooting
Why is my cream layer runny? Likely overmixed or warm ingredients. Chill it more to firm up.
Why isn't it setting? Allow enough fridge time. A full overnight chill works best.
Variations & Customizations
Dietary Adaptations
- Make it gluten-free with a GF chocolate cake base.
- Go low-sugar with sugar-free pudding and sweetener in the cream cheese mix.
Flavor Twists
- Add espresso powder to the pudding for a mocha vibe.
- Layer with peanut butter cups or crushed cookies.
Seasonal/Holiday Versions
- For Valentine's Day, add raspberry sauce and heart-shaped truffles.
- Make a peppermint version for winter by adding crushed candy canes.
Conclusion
This heavenly chocolate cheesecake isn't just a recipe-it's an experience. With its layers of richness, cloud-like cream, and indulgent toppings, it brings comfort and celebration to every spoonful. Whether you're making it for a birthday, a potluck, or just a Tuesday night treat, I promise this dessert delivers more than sweetness-it delivers joy. Let me know how it turns out in the comments below, and don't forget to tag your creations.
Print
Heavenly Chocolate Cheesecake
- Prep Time: 20 minutes
- Total Time: 20 minutes
- Yield: 12 1x
- Category: Dessert
- Cuisine: American
Description
This no-bake heavenly chocolate cheesecake layers rich chocolate cake, velvety cream cheese, silky pudding, and glossy ganache into one indulgent dessert. With garnishes of truffles and chocolate shavings, it's as beautiful as it is delicious.
Ingredients
- 1 package chocolate cake (baked and crumbled)
- 1 package cream cheese (softened (8 oz))
- 1 cup powdered sugar
- 1 teaspoon vanilla extract
- 1 container whipped topping (Cool Whip, thawed, 8 oz)
- 2 cups chocolate pudding
- 1 cup chocolate sauce or ganache
- Chocolate truffles or chocolate balls (for garnish)
- Chocolate shavings (for garnish)
Instructions
- Crush the Cake Base: Start by baking your chocolate cake if not already done. Once cooled, crumble it into small, bite-sized pieces and layer it into the bottom of your trifle dish or serving bowl.
- Make the Cream Cheese Layer: In a mixing bowl, beat the softened cream cheese with powdered sugar and vanilla extract until smooth and creamy.
- Fold in the Whip: Gently fold the whipped topping into the cream cheese mixture to lighten it.
- Layer with Love: Spread the cream cheese mixture over the crumbled cake. Then spoon on the chocolate pudding in an even layer.
- Drizzle the Ganache: Pour the chocolate sauce or ganache over the pudding layer, letting it drip deliciously down the sides.
- Repeat: Add another round of crumbled cake and repeat the layers until ingredients are used up.
- Top it Off: Garnish with truffles, chocolate balls, and generous chocolate shavings.
- Chill: Refrigerate for at least 4 hours or overnight until set and cold.
Nutrition
- Calories: 420